Author Archive

Turris Mox Thoughts/Review/Mods

Sunday, July 28th, 2019

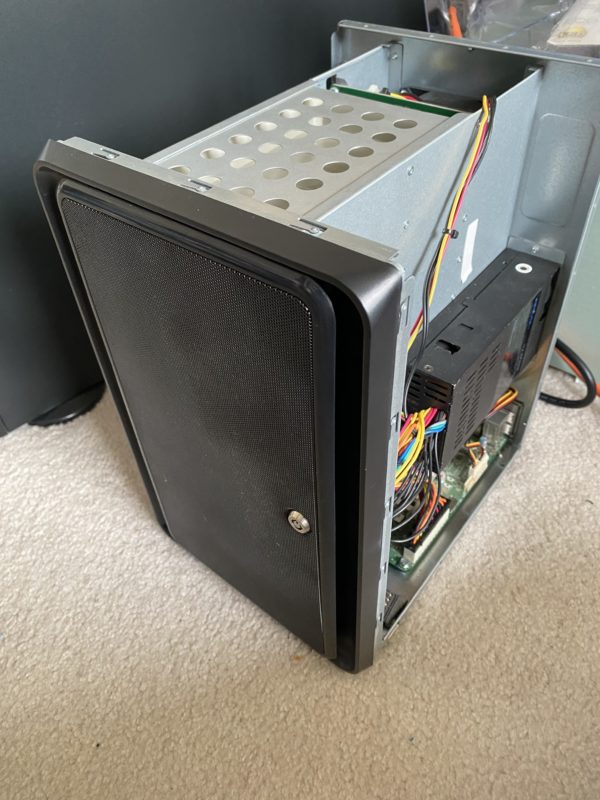
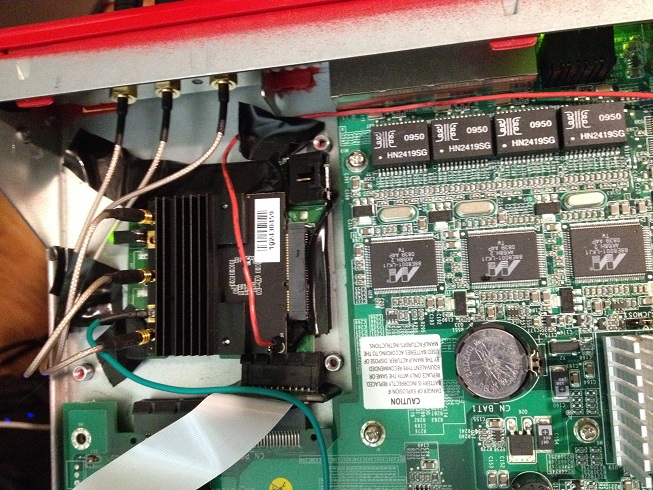
I finally got my Turris Mox. I’ll start with an “as-is” review, then head into the improvements that I made.

(more…)

Lessons in Multihreaded Programming: Don’t Assume Anything will Run in a Timely Manner

Saturday, September 15th, 2018

I recently ran into an issue, where I had a loop that was to be run concurrently in multiple threads, that looked something like this:

loop:
    main_stuff()
    only the last thread to get here in every wakeup cycle should perform this:
        additional_stuff()
    wait()

In other words, the goal was to have every thread run main_stuff(), but have additional_stuff() run after every thread has had a chance to run main_stuff().

The first solution I came up with was this (pseudocode):

AtomicInt totalThreads;
AtomicInt waitingThreads;
Object notifier;
try:
    totalThreads.increment()
    loop:
        main_stuff()
        if waitingThreads.incrementAndGet() == totalThreads.get()
            additional_stuff()
        synchronized (notifier) {
            notifier.wait()
        }
        waitingThreads.decrement()
finally:
    totalThreads.decrement()

At first glance, this would seem to work. Some testing indicated that it did. However, if an OS has exceptionally poor scheduling, or only has one CPU core to work with, then what would happen is:

  1. Let’s say two threads are at the wait() part
  2. They both get the signal to proceed
  3. One thread gets all the way back to the check before additional_stuff() before the other thread gets to the decrement()
  4. Because the number of waiting threads is still equal to the total number of threads in the loop, it runs additional_stuff() when it shouldn’t have.

In this particular case, additional_stuff() running an additional time wasn’t harmful to the operation of the program, merely a performance issue. But the issue didn’t even manifest until testing it on multiple different platforms.

The fully-working solution that I came up with after seeing the problem was this:

AtomicInt totalThreads;
AtomicInt waitingThreads;
AtomicInt counter;
Object notifier;
try:
    int lastCounter = counter.get();
    totalThreads.increment()
    loop: 
        main_stuff()
        if waitingThreads.incrementAndGet() == totalThreads.get()
            additional_stuff()
        synchronized (notifier) {
            while counter.get() == lastCounter():
                notifier.wait()
        }
finally:
    totalThreads.decrement()

void notify():
    synchronized (notifier) {
        notifier.notifyAll()
        counter.set(0)
    }

Notice this version correctly handles this, by having the notification operation reset the variable, then waiting for every thread to catch back up. It also accounts for multiple notifications happening while one or more threads are still processing main_stuff().

Script to Fix Broken RRDs

Monday, February 19th, 2018

OpenWRT seems to have issues with inserting bad data into RRDs, especially after reboots. I made the below script to fix affected files:

#!/bin/bash

FILE=$1
TIMESTAMP=`date +%s`

if [ -f $FILE ]
then
 rrdtool dump $1 > $1.xml
 sed -i "s/<lastupdate>.*<\/lastupdate>/<lastupdate> $TIMESTAMP <\/lastupdate>/" $1.xml
 rm $1
 rrdtool restore $1.xml $1
 rm $1.xml
else
 echo "File does not exist: $1"
fi

Save it somewhere in your $PATH, and chmod +x it. You may also wish to change /bin/bash to a different compatible shell, as you may not have bash installed.

To use it, simply stop luci_statistics (and anything associated with it – check ps to see if any collectd processes are still running). Then, run something like this:

find /srv/rrd/ -name '*.rrd' | xargs -n 1 rrdfixer

where /srv/rrd/ is the path to your RRDs that you want fixed, and rrdfixer is the name of the script.

What happens to the RRDs is that instead of proper timestamps, “NaN” gets inserted instead. Simply replacing these with the current time won’t fix the bad data, but it will at least allow new data to be written to the file.

Turris Omnia First Thoughts/Mini-Review

Friday, November 11th, 2016

I was able to get in on the early bird deal for the Omnia, so for me it was only $200 including shipping. I can safely say it’s worth every penny of it.

There are a couple outstanding bugs, like:

  1. certain RRD graphs not working
  2. A bug that affects dhclient+LXC
  3. kresd not supporting (or not configured for) local name resolution

In addition, the auto-updater will reinstall certain packages even if you removed them manually.

Apart from that, everything is great. The 12 LEDs on the front can all be individually colored and can be either left to be controlled by the hardware (except for the PCIe and user-defined LEDs) or have triggers manually specified.

The device easily has enough horsepower for the purposes of a networking device, and there is a 2GB RAM upgrade available. As for networking, the main switch (the 5 LAN ports) has two connections back to the CPU, allowing for more bandwidth on topologies with multiple internal networks. The WAN port automatically switches between TP and SFP, allowing you to connect to certain fiber ISPs without a modem or interface converter.

The system provides three miniPCIe slots, with the one closest to the CPU supporting mSATA and the one furthest away supporting a SIM card. The middle slot is pre-filled with the full-length 2.4/5GHz Wifi card, with the one closest to the CPU having the half-length 2.4GHz-only card. This means that if you want to use a third full-length card or cellular card, you’re good to go. However, if you want to use an mSATA drive, you’ll need to move the 2.4GHz card to the SIM slot. This entails taking the entire board out of the case, since you’ll need to move the mPCIe standoffs from half-length to full-length and vice versa, which requires taking the board out of the case. You might have to do that anyway if you aren’t careful, as I was able to make one of the standoffs come unscrewed simply by trying to remove the card. Other users have also reported some lose screws.

The case itself has five holes for bulkhead-mount pigtails/antennas. It comes with three 2.4/5GHz antennas, with the outer two using signal combiners/diplexers to run on both 2.4GHz and 5GHz, with the inner antenna being 5GHz only. You can use the extra two antenna holes to add extra antennas for a third band or a cellular modem, or just add dedicated 2.4GHz antennas rather than using diplexers. However, this might prove to be insufficient antenna holes when 4×4 MIMO hardware becomes more commonplace (Compex has a card in the works, but it’s currently in pre-order, and only then it doesn’t include an RF shield). Still a downgrade from the 16 antenna holes on my RSPro case.

The board also provides plenty of headers to use. 10 GPIO lines, 2 UARTs, JTAG, and a 12/5/3.3v header which could be used to power a hard drive (assuming it supports enough current). It also has 2 USB 3.0 ports, a nice step up from the RSPro’s single USB 2.0 port.

One very useful feature is schnapps, which is a program that manages BTRFS snapshots. You can make use of the second reset mode (hold the reset button until two LEDs light up) to reset to the latest snapshot. This allows a faster option to get the router up and running in case of locking yourself out, but you lose the ability to drop into a rescue shell to fix the problem non-destructively. In addition, resetting with 3 LEDs on reverts to the factory snapshot. If it’s still hosed, mode 4 allows for a reflash from a USB drive, while 5 LEDs enables a recovery shell via UART. This has several advantages over the more traditional squashfs root + RW overlay, but has the disadvantage of not having compression. It also keeps the kernel in the filesystem and allows it to be updated, something that you would normally have to reflash for.

Overall, I’d give it a 9.5/10. Only things stopping it from being a 10 are the aforementioned software bugs, and a possible lack of future expandability as M.2 replaces mPCIe. I ran into the same issue with the RSPro and its miniPCI slots, but the difference here is that mPCIe to M.2 adapters are readily available, cheap, and still offer enough bandwidth (500MB/s per slot with the Omnia’s PCIe 2.0) compared to the much less common miniPCI to miniPCIe adapters which would be a bottleneck anyway once Wifi starts breaking gigabit speeds. As for >1gb WAN connections, you might run into trouble there, but in theory, it would be possible to rig a 10GbE card up to the Omnia and still have it operate at 4gb/s.
The WiFirebox

Saturday, January 24th, 2015

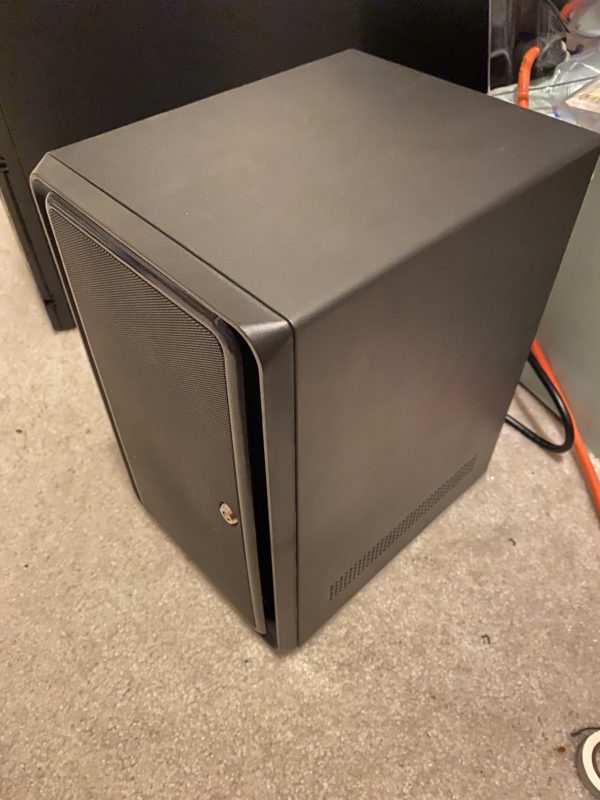
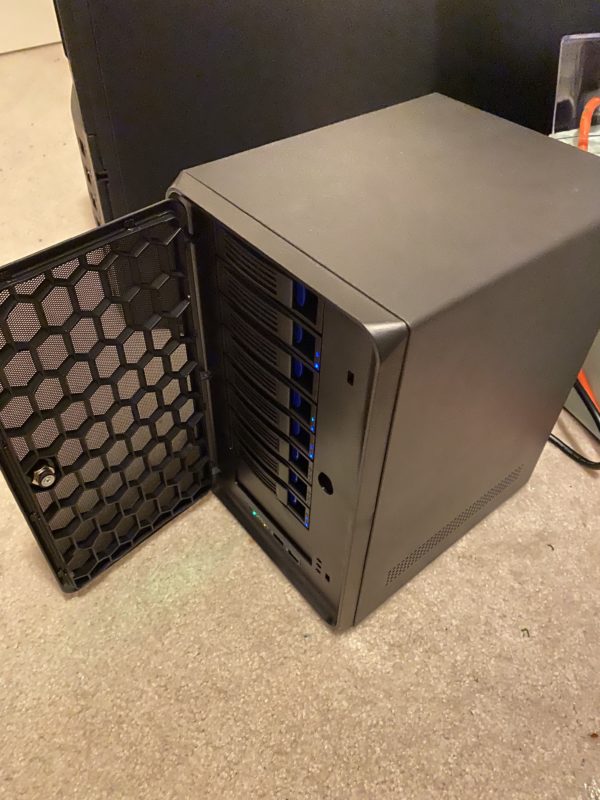
Need WiFi in a Firebox? No problem. You just need a PCIe to miniPCIe adapter, a PCIe flex adapter, and a Wifi card (preferably one that supports AP mode of course).

IMG_0452_small

Now, I made the mistake of trying to do this with the WLE900V5-27 as pictured. It’s a great card if you can get it to work, but barely worth the hassle. The card uses external ground and 5v connections, and it’s massive. The two problems that the card’s size presents are that you need a miniPCIe adapter with enough space around the slot (I used the MP2W), and you have to deal with the huge RF shield on the bottom of the card too. The RF shield means that not only can there not be any components on the board below, but you’ll also have to tape over anything possibly conductive. I used the MP2W adapter, which came with some capacitors which were in the way of the card. Fortunately, they weren’t necessary for the adapter to function so removing them was safe. Unfortunately, I missed a part that needed to be insulated the first time around, so one of the FFC cables let some magic smoke out and I had to switch to the other one. Nothing else was damaged so everything worked fine once I fixed the insulation issue.

On top of that, the card uses MMCX connectors, so you’ll have to get different pigtails as well. As for actually mounting the pigtails/antennas, the easiest way is to take the PCI bracket the adapter comes with, take the pieces that hold the card to the bracket, and bend them so that they’re parallel with the rest of the bracket. Then, you can secure it in place with whatever means necessary.

Using the Firebox Arm/Disarm LED under Linux

Friday, November 14th, 2014

Quick script for controlling the arm/disarm LED, created from the info here. I took a quick stab at trying to make WGXepc run on Linux but didn’t have any luck, so I just created this instead.

#!/bin/sh

lport='dd of=/dev/port seek=1167 bs=1'
fport='dd of=/dev/port seek=1179 bs=1'

steady="\x00"
green="\x13"
red="\x0b"
flash="\x10"
off="\x03"

case $1 in
r|red)
 printf $red | $lport 2>/dev/null
 ;;
g|green)
 printf $green | $lport 2>/dev/null
 ;;
off)
 printf $off | $lport 2>/dev/null
 ;;
steady)
 printf $steady | $fport 2>/dev/null
 ;;
flash)
 printf $flash | $fport 2>/dev/null
 ;;
*)
 echo 'Usage: wgled (red|green|off|steady|flash)'
 ;;
esac

Unfortunately since it’s just a single bidirectional LED, there’s no way to get the green and red on at the same time.

These addresses and values are for the X-Core-e boxes. For other boxes, look in the WGXepc source (available here) to find values and addresses. The value that you printf is the value you want to write, while the seek value for dd is the address, converted to decimal.

Still not sure how to control the disk or expansion LED.

OpenWRT Firebox Part 2

Friday, October 31st, 2014

I’ve started using the Firebox mentioned previously as my main device. I upgraded it to 14.07 and had to go through the installation process again, so I’ll document some of the quirks involved in getting it to work.

(more…)

Using the ThinkVantage LED on an x300

Friday, August 15th, 2014

Short version: I figured out a way to control it that will actually work on modern systems. Read below to see how to get full control of it (even more control than you get from the other LEDs, including 3 different blink modes).

After googling and digging through some resources such as this thread, I had come up empty-handed, since the /proc/acpi/ibm/ecdump interface is deprecated and no longer included in the thinkpad-acpi driver. The solution: a fancy new program called “ec_access“, which uses the sysfs embedded controller interface, rather than the deprecated procfs one.

Just one problem: it’s not enabled in the kernel by default. I’ll leave you to figure out how to compile a custom kernel for your distro, but the config option that needs to be enabled is “CONFIG_ACPI_EC_DEBUGFS”. This will expose /sys/kernel/debug/ec/ec0/io, which ec_access uses. While you’re at it, you may also want to enable “CONFIG_THINKPAD_ACPI_UNSAFE_LEDS”, which will give you control over the orange and green battery LEDs.

Once you’ve got the kernel working, and can confirm that /sys/kernel/debug/ec/ is present on your system, compile ec_access.c.

Now, you should be able to run “ec_access -w 0x0c -v 0xXY”, where Y is the LED number (“d” in the case of the thinkvantage LED), and X is one of the following:

  • 0-7: LED off
  • 8-b: LED on solid
  • C: Slow, heartbeat-like pulse
  • D: Smooth, slow pulsing
  • E: Faster blink
  • F: LED on solid

Now, you can use this LED in scripts or whatever you need it for. Unfortunately, I haven’t taken time to look at how one would modify thinkpad-acpi to support this LED (or even why its existing tpacpi::thinkvantage LED interface doesn’t seem to work for this).

Known issue: The LED doesn’t seem to run at full brightness when it is set to solid. It is visibly brighter when put in one of the blink modes.

Mini-review: Intel 7260HMW (Updated 2014-11-18)

Wednesday, July 2nd, 2014

I bought this to replace a Wi-fi card in my laptop (Thinkpad X300) since the standard card had flaky Linux support. The 7260HMW is a half-length miniPCIe card with 2xU.FL connectors.

Good:

  • 802.11ac support
  • Good Linux drivers, works out of the box on Debian testing
  • Built-in Bluetooth 4.0
  • Supports AP Mode
  • Low power usage

Bad:

  • General signal strength is slightly on the poor side (happens on both Linux and Win7 so it’s not a driver issue)
  • Only 2 spatial streams supported, only 2 antennae. If you currently have 3/4 spatial stream 802.11n APs, this card could possibly see worse performance than a 3/4 stream client.
  • AP Mode is completely half-assed, only supports 2.4GHz band which means no 802.11ac Also it only supports 1 AP or STA at a time. See the dump below, section “valid interface combinations”.

Other:

  • If your laptop has a Bluetooth LED in addition to Wi-fi like on many Thinkpads, this card won’t interact with it. In fact, having multiple BT cards (this card+builtin BT) can even cause the LED to not even work with the builtin BT if you choose to leave it installed (Easy enough to remove on my X300 but difficult on my W510).
  • The Wi-fi LED will just be on solid, rather than on+blink on activity. Does this on Win7 and Linux, and none of the settings in /sys/class/leds/phy0-led/trigger seem to get the desired behavior. If you want this functionality, you’ll have to write a script to manually toggle the LED (There’s a netdev LED trigger out there, but it was very unstable for me).

Stuff:

Dump of phy info. Note the no-IR flags on the 5GHz frequencies, meaning 5GHz AP mode is not supported.

Using the Sierra MC5725’s GPS on Linux

Sunday, June 15th, 2014

After not being able to get this card’s GPS to do anything, I forgot about it for a while. Now that I’ve had some time, I revisited it and was able to get it working. Read on to see how.

(more…)