Turris Mox Thoughts/Review/Mods
I finally got my Turris Mox. I’ll start with an “as-is” review, then head into the improvements that I made.

Review
The Mox is impressive in its own way. It doesn’t have much in terms of CPU, so I probably wouldn’t use it as my main networking device (plain routing would probably be fine, but I need VPN performance as well). However, when maxed out, it can pack quite a bit. 25 GbE ports, one SFP port, 2 mPCIe slots, a 2×2 SDIO WiFi card, SD slot, and a USB 3.0 port. One of the mPCIe slots can be sacrificed for 4 more USB 3.0 ports. Individually, these are nothing special, but I haven’t seen devices that can do all of that at once. Potentially, this device could replace a router/AP as well as a 24-port switch. WWAN cards (both plain USB and mPCIe/USB) could also be used to provide cellular connectivity.
I didn’t actually need all of this, so I didn’t go overboard with accessories. I just wanted a solid AP that, hopefully, I’ll be able to upgrade to 802.11ax when the time comes. I opted for the “Power WiFi” base, and the G extension module (extra mPCIe slot).
The software side is what you’d expect. It comes loaded with a 4.0 beta version of Turris OS (OpenWRT based). It has the ability to netboot off of an Omnia, but I haven’t tried that out yet. Turris OS gives you easy graphical configuration via Foris, but it works in parallel with LuCI. You also have the usual CLI if you’d prefer that. Apart from this, it’s standard OpenWRT/LEDE, so there’s not much to go over here. I don’t actually use Foris that much, so I won’t go over it. The only part I really use is the updater, which has significantly improved since the early days.

My biggest issue with the hardware is the SDIO card firmware. It has numerous known issues. I need multiple SSID on both bands, so I decided to replace it (see below).
In terms of DIY expansion, you have up to 2 mPCIe slots, as well the 34 pin connector. The 4 GPIO lines are most likely what you’d be after. The rest of it is power, boot configuration, I2C, and direct access to the system flash.
The main expansion ports for additional modules use a physical PCIe connector, but electrically it is not PCIe. PCIe is one of many busses provided by the connector, but the pins are not in the same location, so don’t try plugging in a PCIe device directly.
The one thing that is lacking, especially compared to the Omnia, is storage. The mPCIe slots do not support SATA SSDs. In theory, they support PCIe-based SSDs, but most of these are M.2, so you’d need an additional adapter to fit it into the mPCIe slot. Your best bet would probably be USB 3.0 storage. The SD slot is another option, but keep in mind that unless you’re network booting, the OS has to live there as well.
Mods
As mentioned above, the SDIO wifi card has some firmware issues. I figured the best course of action was to simply get an even better 5GHz card, use the 3×3 2.4/5GHz card for 2.4, and then just remove the SDIO card until the issues are fixed.

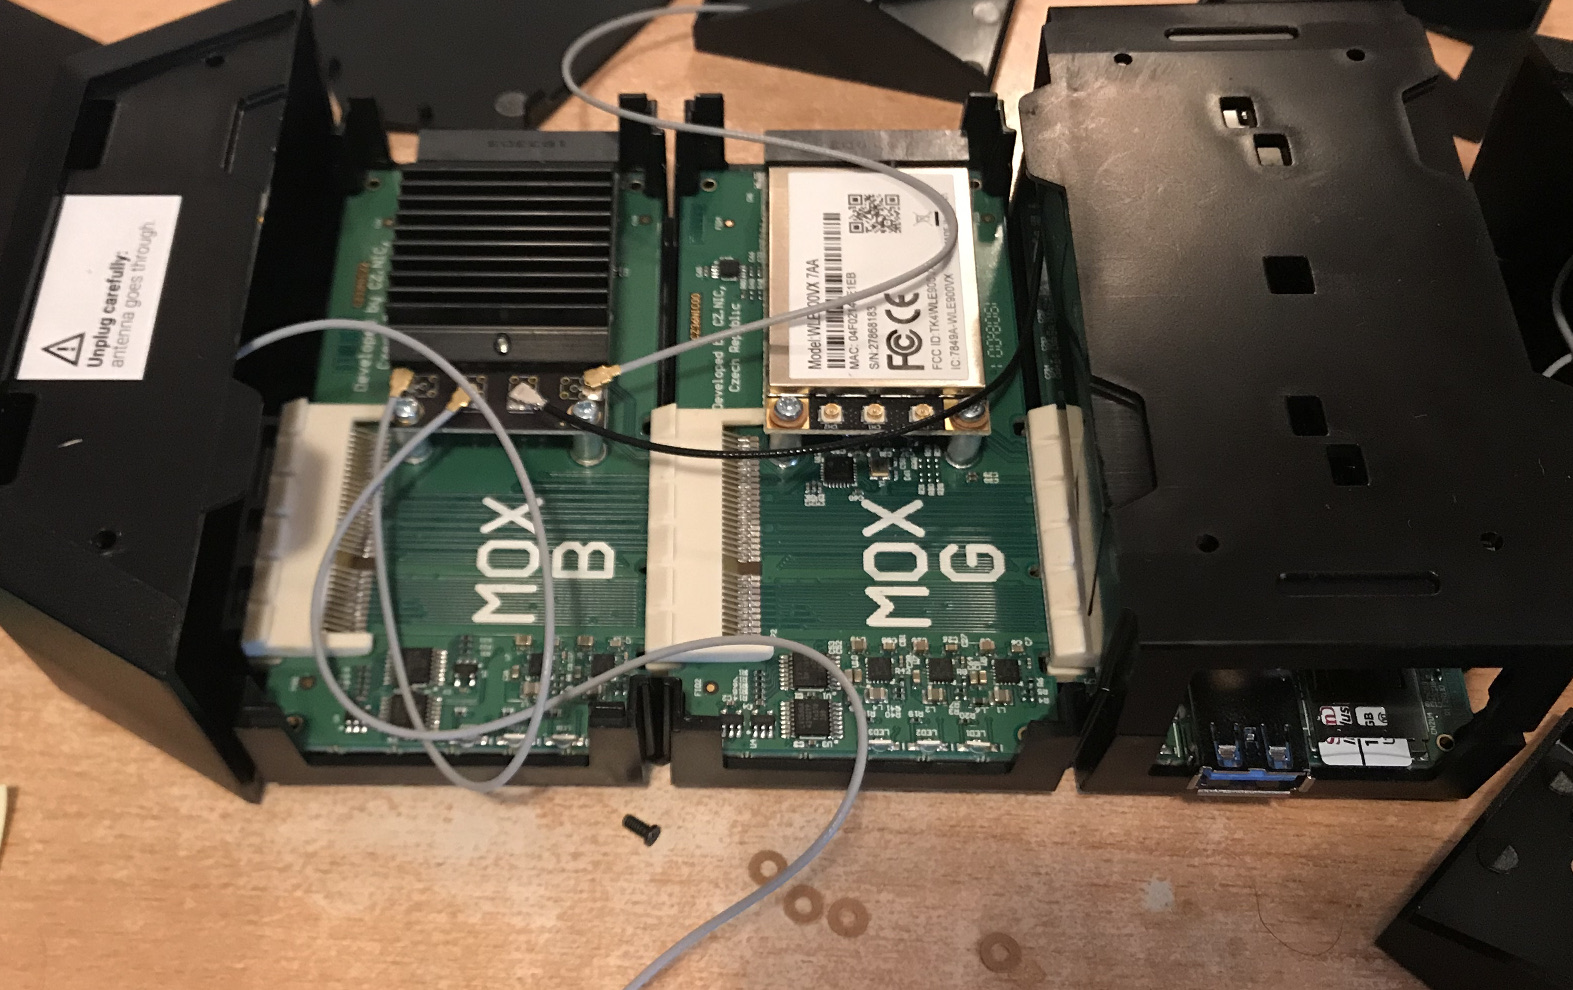
I went with the Compex WLE1216v5-20 as my 5GHz upgrade. The Mox has plenty of vertical clearance both above and below the mPCIe slots, which is often the issue with using beefy Compex cards. Normal cards have an RF shield on top, and nothing on the bottom, but these have the RF shield on the bottom, and a heatsink on top.

As for antennas, the Mox has no way of mounting external antennas. This limits us to internal antennas only. I figured that since I’d need 7 antennas (4×4 5GHz + 3×3 2.4GHz), I could use the 5 included antennas and buy 2 more. Unfortunately, I forgot that the SDIO card’s antenna connectors were not the standard U.FL (something smaller, W.FL I think), so I wouldn’t be able to use those. As a result, I just stuck with the SDIO Wifi for 2.4GHz, and put one additional antenna in for 5GHz.

Let’s get to the main problem with the 1216: heat. This card has a heatsink for a reason, and the Mox doesn’t have much in the way of airflow. The card’s stated operating temperature range is -20 to 70C. Conveniently, it has a temperature sensor, which shows up in sensors. The card would run at about 75C against a 25C ambient temperature. Granted, this is the temperature of the card itself, while the temperature range is likely the expected ambient temperature range, but I’d still rather be safe than sorry.
Turning down txpower didn’t seem to help. The only thing that did help was not fully assembling the Mox’s enclosure: running it with the “endcaps” for that particular module removed lowered the temperature by 3-4C, and running it completely open-top lowered it by about 8C total. However, I’d like to be able to run it fully assembled, so I instead resorted to adding a fan.
I considered three different approaches to putting a fan in:
- Mount fan(s) on the end and let air flow end to end.
- Mount fan vertically in front of WiFi card.
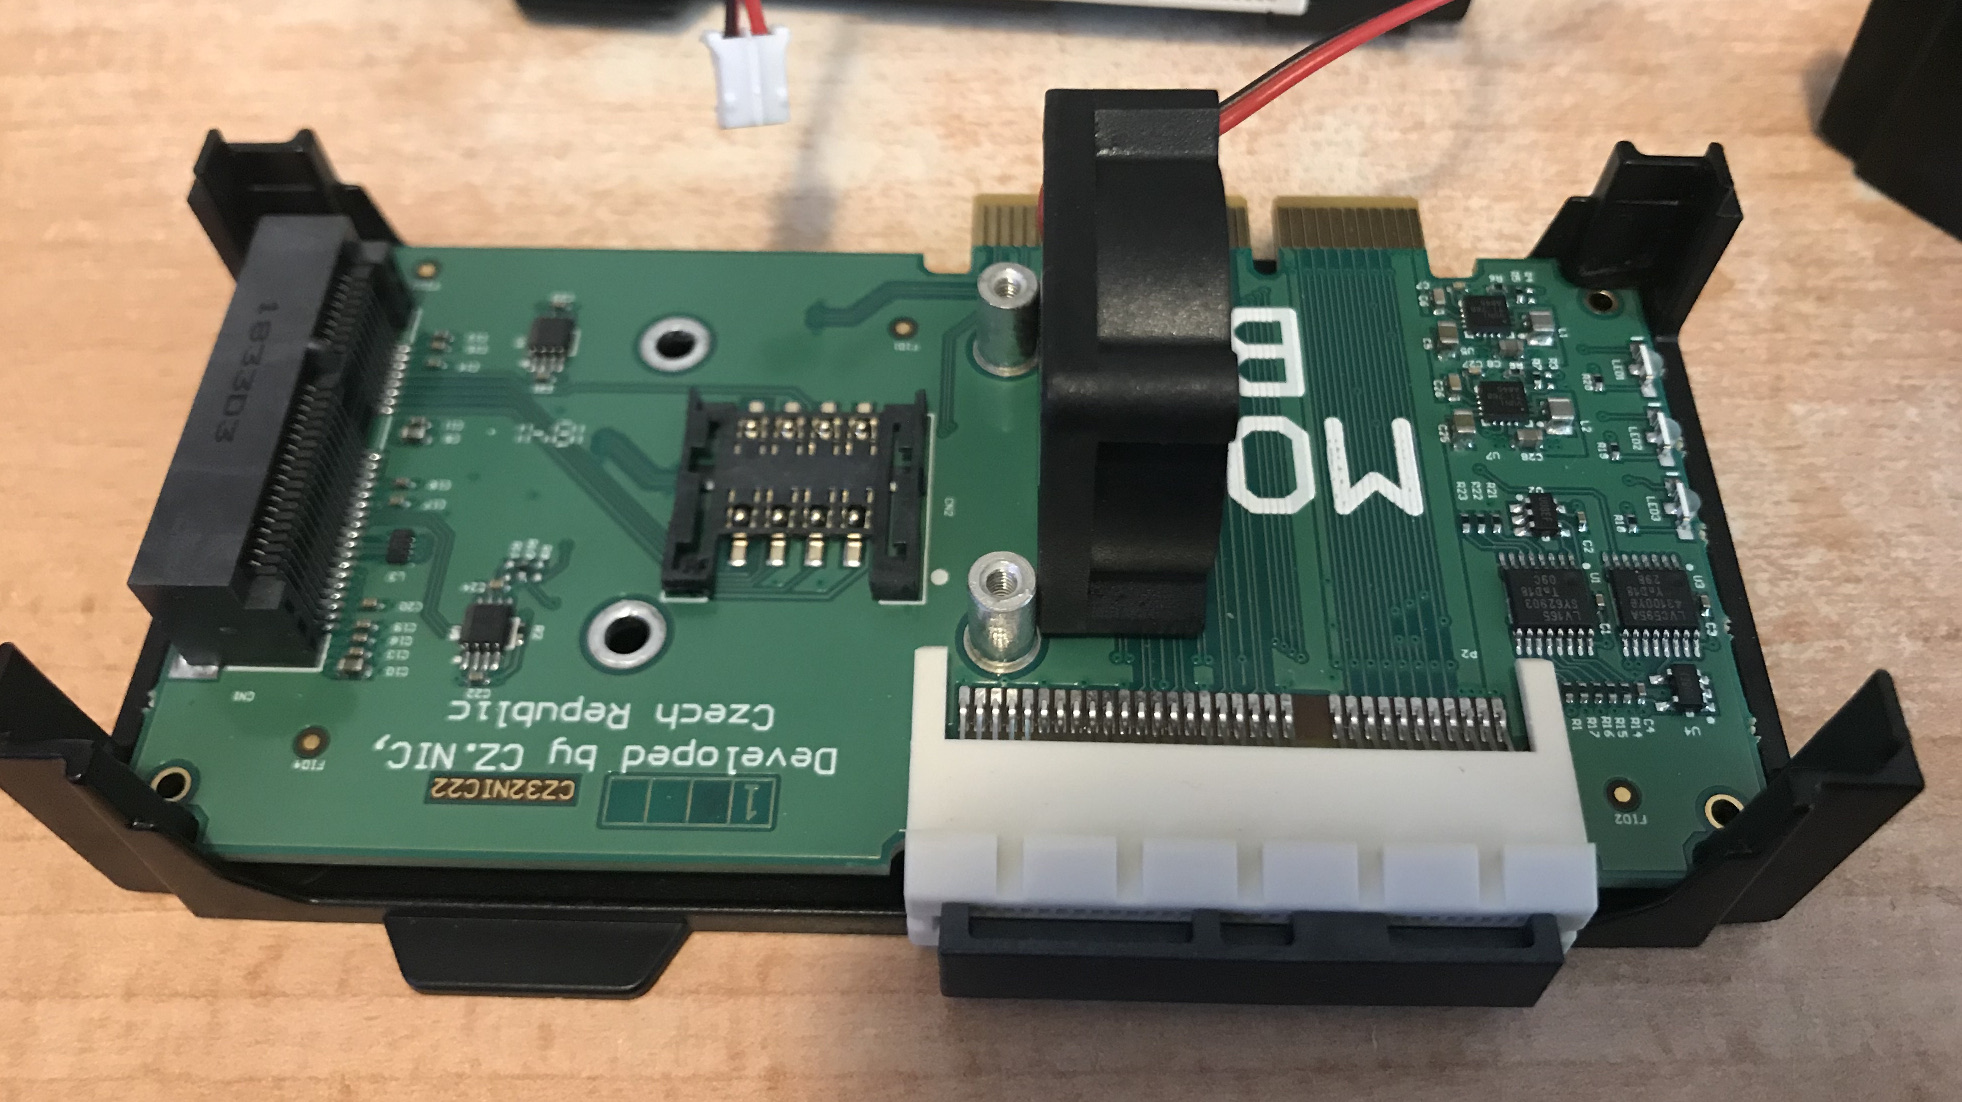
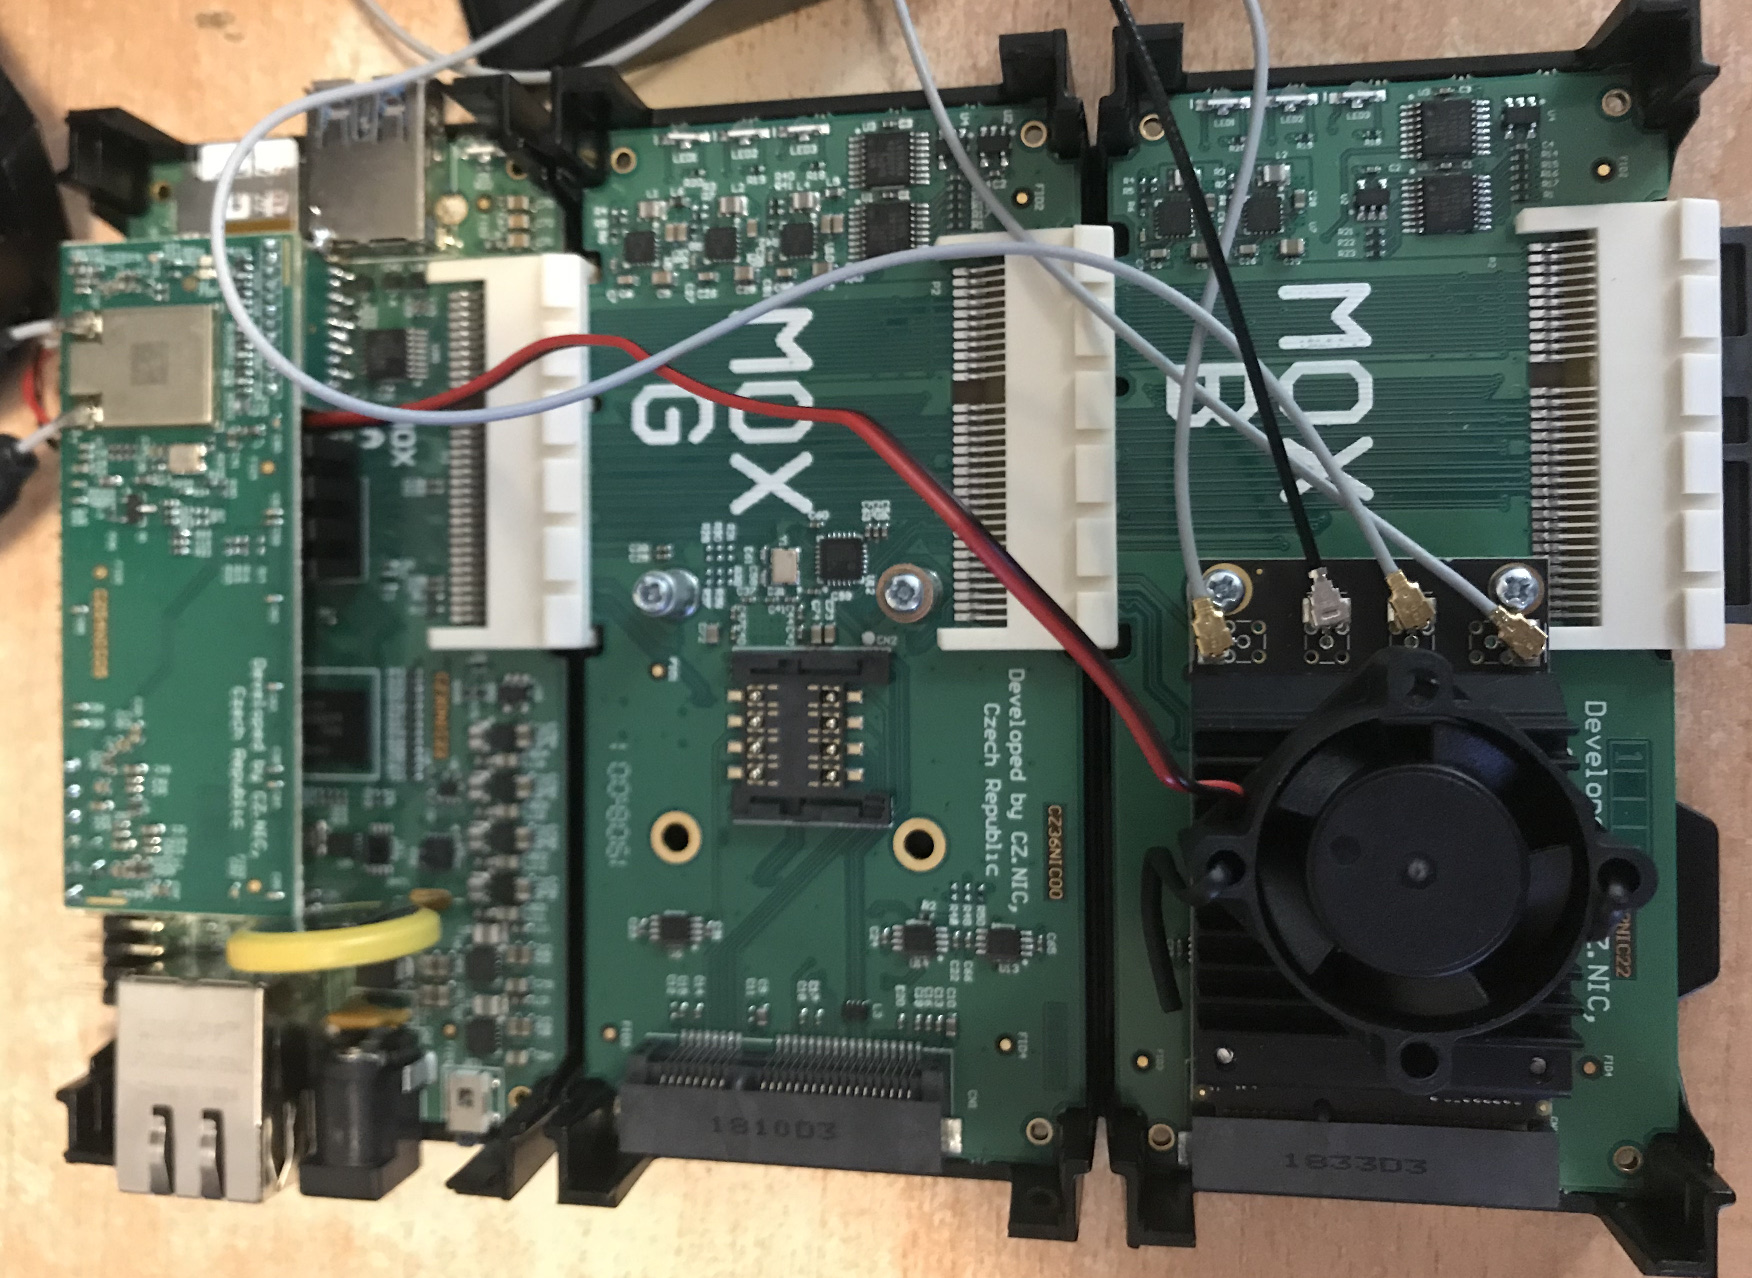
- Mount fan horizontally on top of WiFi card.

#1 seemed questionable, as the way the case is designed, the air isn’t really forced to flow over the components where it’s most needed. #2 would work, but there didn’t seem to be an easy way of mounting the fan. I went with #3, since a single twisty could keep the fan secured to the card and provided the most direct cooling.

The only downside of this arrangement is that there’s not a whole lot of clearance between the top of the fan and the ceiling of the case. However, given that the results turned out okay (see below), I don’t think this is a huge deal.
The next order of business was powering the fan. I wanted the fan to be quiet, so I didn’t want to give it full power. However, unlike the Omnia, which provides the same 12v, 5v, and 3.3v pins you’d expect from a PC power supply, the Mox only gives you easy access to 12v and 1.8v (due to having both USB and mPCIe, 5v and 3.3v should be available with a bit of soldering). 12v made the fan spin at full speed, which, while quiet, was still noticeable. 1.8v made the fan twitch, but it just couldn’t fully start spinning. I settled for 12v with a 47ohm resistor, which was still effective at cooling while still being quiet enough. If I decide to put one of these in the Omnia as well, I’d just wire it to the 5v or 3.3v line. Or, the even easier alternative: spend $25 extra on the industrial version of the card, which has a temperature range of -40 to 85C.

This got the card down to a reasonable ~57C (same 25C ambient), with the noise only being noticeable if there’s nothing else producing any noise in the room. Overall, that’s a drop of almost 20C. I’m quite happy with that result.
One issue with the card is that I couldn’t seem to get 160Mhz working. This isn’t a huge deal, as actually getting 160Mhz of bandwidth is a pain due to interference (as well as the fact that the card only does 2 spatial streams when running in 160MHz mode). The lack of software support for it is unsurprising since the included WLE900VX doesn’t do 160Mhz. I’d rather do discontiguous 80+80MHz, but I can’t figure out how to actually configure that.
Next steps: I’ll probably buy one of these for my Omnia as well, and sort out my antenna situation.
A Few Extra Points of Note
- The Mox does not come with the firmware for the card. You’ll need to install either the reference firmware (
ath10k-firmware-qca9984) or the Candelatech firmware (ath10k-firmware-qca9984-ct). I tried the CT firmware first, but ran into a firmware crash within 24 hours. The stock firmware has been stable. - The fan I used was 25x25x10mm. A 40x40x10mm would have just barely fit at well, but would have blown a lot of the air around the heatsink rather than into it. Also, all the 40mm fans I had handy were too loud.
